Almost every one of us has used placeholders – whether it was to signup for a Gmail account or completing a feedback form. Contact Form 7 (CF7) also lets you add placeholders on your contact forms to enhance your users’ experience.
In this article, we show you how to add placeholders in your Contact Form 7 forms.
What are placeholders & how do they work
Placeholders are descriptive text displayed inside an input field until the field is filled. They disappear when you start typing in the field.

Placeholders offer the following advantages:
- Make it easier for users to understand the info required in your form
- Include detailed examples in each form field
- Supplement shorter information given in form field labels
- More information & less clutter – without making your form too lengthy.
Try it yourself
In the working example form below, you can see placeholders in action with:
- Placeholders giving detailed instructions for each form field.
- The placeholder text fading to a lighter color as you enter each field.
- The placeholder vanishing to be replaced by your input when you start typing.
Tip: You can re-create this exact styleStyle When you select a CF7 Skins Style the aesthetic design (CSS code) is automatically created and applied to your form. by selecting Cargo as your CF7 Skins Style.

Add a Contact Form 7 placeholder
These instructions re-create the example form shown above using the following alternative methods:
Tip: Use whichever alternative method you prefer – they all achieve the same result.
1. Using CF7 Skins Visual Editor
You can set a placeholder in your form, using the CF7 Skins Visual Editor, by following these steps:
1. In the Skins section of your Contact Form 7 form, go to the Form tab.

2. Click the Edit icon ![]() of the form field where you want to add a placeholder.
of the form field where you want to add a placeholder.
![]()
3. Enter your placeholder in the Default Value field on the Edit Dialog box that appears in the sidebar.

4. Check Use this text as the placeholder of the field.
5. Repeat these steps on each field where you want to add a placeholder.
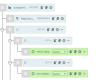
| Field | Default Value |
|---|---|
| Name | Enter your name |
| Enter your email address | |
| Message | Enter your message |
6. Once you are satisfied with your changes, click Save Visual to save the form.
Your form should look like this:

Tip: You can click Done to close the Edit Dialog box if you want, but you don’t need to do this – your changes are updated in the CF7 Skins Visual Form tab as your type.


2. Using the Contact Form 7 Form Tab
You can also use the CF7 Form Tab to add a placeholder in your form field by following these steps:
1. Go to your Contact >> Contact Forms >> Form.

2. In the [text* your-name] part of your field, add placeholder "Enter your name".

3. Update all the fields with necessary placeholders.

Tip: Any changes made in the Contact Form 7 Tag Editor will not be reflected in the CF7 Skins Visual Editor.
However, any changes made in the CF7 Skins Visual Editor will be added in the Contact Form 7 Tag Editor when you use Save Visual.

3. Using Contact Form 7 Form-tag Generator
You can also add placeholders from the Form-tag Generator for Text Fields:
1. Go to your Contact >> Contact Forms >> Form.
2. Select text option from the list of CF7 tags.

3. In the pop-up box, enter your placeholder in the Default value field.

4. Select Use this text as the placeholder of the field to add the Default value as a placeholder.
5. Click Insert Tag.
6. Repeat on each field where you want to add a placeholder.

Tip: Changes created using CF7 Form-Tag Generator will also not be reflected in the CF7 Skins Visual Editor.
However, any changes made in the CF7 Skins Visual Editor will be added in the Contact Form 7 Tag Editor when you use Save Visual.
Where can you use placeholders in Contact Form 7?
You can use placeholders in the following CF7 form-tags:
- text
- url
- tel
- textarea
- number
- range
- date
- captchar
Further Reading
- Contact Form 7 Documentation – Placeholders
- Easily Add Contact Form 7 Placeholder Text To Any Input Field – Video
- Better Contact Form 7 Checkboxes & Radio Buttons