A Contact Form 7 (CF7) form can have much more than just some fields for taking user inputs and a submit button. You can make your form more flavored by adding just the right combination of input fields, paragraphs, links, text, labels, and buttons.

In this article, we show you how to add links, paragraphs, and text labels in your Contact Form 7 forms and how they can be useful to your users.

These instructions cover the following ways to add text labels, paragraphs, and links in your Contact Form 7 forms:
Tip: Doing this correctly can make your forms easier to fill in and boost usability and readability.
Adding text labels to your form inputs
You should add text labels in your forms whenever possible.
- They help form users understand your form and let them know what is required in each field
- Clicking on the text within the label tags automatically highlights the respective form field
- Label tags are also extremely useful for screen readers as well.
We cover the following methods of adding text labels to your form inputs:
Tip: Use whichever method you prefer – both achieve the same result.
Adding text labels from the CF7 form tab
You can add text labels to an input field from the CF7 Form tab by following these steps:
1. Go to your Contact >> Contact Forms >> Form.

2. In the Form tab, add the label and the form element within the label tags:


3. Alternatively, you can use the id and the for attributes to separate the form-tag from the text label:

4. Update all the fields with the necessary text labels.
5. Click Save.
The text labels are now displayed in the form as shown below:

Adding text labels using the CF7 Skins Visual Editor
To add a text label for a field using the CF7 Skins Visual Editor follow these steps:
1. Go to your Contact >> Contact Forms >> Form.
2. Scroll down to the Skins section.

3. Drag and drop the desired field from the FIELDS (CF7 TAGS) section.

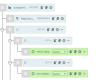
4. Click the Edit icon of the field where you want to add the label.
![]()
5. Enter the desired Label and click Done.

Tip: You can click Done to close the Edit dialog box if you want, but you don’t need to do this – your changes are updated in the CF7 Skins Visual Form tab as you type.

6. Update all the fields with the necessary text labels.
7. Click Save Visual.
The text labels are now displayed in the form as shown below:

Adding paragraphs in your forms
Sometimes, labels and placeholders are not enough to describe the input fields of a form. In those cases, you can add paragraphs in between the fields to tell your users exactly what you require from them or give additional information about the field.
We cover the following methods of adding paragraphs in your forms:
Tip: Use whichever method you prefer – both achieve the same result.
Adding paragraphs from the CF7 form tab
To add a paragraph from the CF7 Form tab follow these steps:
1. Go to your Contact >> Contact Forms >> Form.

2. In the Form tab, add a paragraph within the <p> tags.

3. Click Save.
The paragraph is now displayed in the form as shown below:


Adding paragraphs using the CF7 Skins Visual Editor
To add a paragraph using the CF7 Skins Visual Editor follow these steps:
1. Go to your Contact >> Contact Forms >> Form.
2. Scroll down to the Skins section.
3. From the FIELDS (CF7 SKINS ITEMS) section, drag and drop a new paragraph element to the desired position in the form.

4. Click the Edit icon of the paragraph.
![]()
5. Add the desired content and click Done.

Tip: You can click Done to close the Edit dialog box if you want, but you don’t need to do this – your changes are updated in the CF7 Skins Visual Form tab as you type.
6. Click Save Visual.
The paragraph is now displayed in the form as shown below:


Adding HTML links to your forms
In web forms, proper addition of links can provide valuable background information to the form inputs. Links provide additional information either by displaying pop-up panels or by directing your users to other web pages. You can also use links to provide references and connections among the elements in your form.
We cover the following methods of adding links in your forms:
Tip: Use whichever method you prefer – both achieve the same result.
Adding links from the CF7 form tab
To add a link from the CF7 Form tab follow these steps:
1. Go to your Contact >> Contact Forms >> Form.

2. In the Form tab, add the title of the link within the <a> tags.

3. Provide the address of the destination webpage as the value of the href attribute.
4. Click Save.
The link is now displayed in the form as shown below:

Adding links using the CF7 Skins Visual Editor
You can use the HTML field provided by CF7 Skins Pro to add any HTML tag to your form. In this case, we can use it to add the a tag for links.
Tip: The HTML element is only available for CF7 Skins Pro users.
To add a link using the CF7 Skins Visual Editor follow these steps:
1. Go to your Contact >> Contact Forms >> Form.
2. Scroll down to the Skins section.
3. From the FIELDS (CF7 SKINS ITEMS) section, drag and drop a new HTML element to the desired position in the form.

4. Click the Edit icon of the HTML element.
![]()
5. Add a pair of opening and closing a tags with the destination address in the href attribute. Enter the title of the link in the middle.

6. Click Done to close the edit dialog.
Tip: You can click Done to close the Edit dialog box if you want, but you don’t need to do this – your changes are updated in the CF7 Skins Visual Form tab as you type.
7. Click Save Visual.
The link is now displayed in the form as shown below:

Further reading
- How to use the CF7 Skins Visual Editor
- Contact Form 7 Documentation – Adding text-labels to input fields
- Contact Form 7 Documentation – How to edit Contact Form 7 templates