You can configure a Contact Form 7 (CF7) form to send email notifications every time the users submit the form. Sometimes, you may need to add file attachments to the emails as well.
In this article, we show you how to attach files in the emails sent on each form submission of your Contact Form 7 form.
Adding File Attachments in Contact Form 7
There are several methods of attaching files in a CF7 email. You can:
- Attach files uploaded by users through the form
- Attach files present inside the wp-content folder on your server
- Attach files both uploaded in the form as well as files in the wp-content folder
Attaching files uploaded by users through the form
To attach a file uploaded in the form, you must first have a form field with a form tag that accepts the file input type. To add a file input field, add the following code in the form.
[file your-file filetypes:pdf|txt limit:2mb]

Tip: You can use the free version on CF7 Skins to add all available File Attachment Options quickly & easily using the CF7 Skins Drag & Drop Visual Editor.
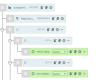
After successfully adding the file input field to your form, you can now configure the File Attachments field in the Mail tab.

1. Go to Contact >> Contact Forms. Open your CF7 form & click the Mail tab.

2. Scroll down to the File Attachments text field.

3. Add the name of the field as a mail-tag.

4. To attach multiple files from the form, simply line them up in the File Attachments field.

5. Click Save.
Tip: You need Matching Mail Tags & Form Tags for each file attachment.
Attaching files present in the wp-content folder on your server
To attach the files from your WordPress site, upload the file inside the wp-content folder. You can create folders inside wp-content to further group the files in the server.
Tip: For security reasons, you cannot specify files outside the wp-content folder as an email attachment.
Then, provide the path to the file in the File Attachments field.

Here, the signature.png image inside the folder wp-content/uploads/ is sent as an attachment in the email.
Tip: You can use the WordPress Media Library to upload files to the wp-content/uploads folder.

Attaching files uploaded in the form with files already in the wp-content folder
To attach the uploaded files as well as the local files, enter the mail-tags of the uploaded files in a single line, followed by one local file path per line in the File Attachments field.

Tip: To provide multiple file attachments, enter one file path per line.
File Attachment Options
Contact Form 7 provides you the following options while adding a file input field in your form:
ID & Class
- ID – add a unique HTML ID to this input tag to add your custom CSS styling to this form field only.
[file your-file id:input-file-field]
- Class – add the specified HTML class to add your custom CSS styling to multiple form fields.
[file your-file class:form-control]
Tip: To add more than one class, add multiple class options. For example,
[file your-file class:form-control class:text-center]
Filetypes
- Filetypes – specify the allowed file formats.
[file your-file filetypes:png]– the form only accepts the files with png extension
Tip: Separate more than one file types with a pipe (|) character. For example,
[file your-file filetypes:png|jpg|jpeg]
Limit
- Limit – control the size limit for the files to be uploaded.
[file your-file limit:2mb]– users cannot upload files greater than 2 MB
Tip: You can provide the limit in kb or mb. If you do not specify a unit, the limit is in bytes.
Further reading
- Beginner’s guide to setting up mail in Contact Form 7
- Matching Mail Tags with Form Tags in Contact Form 7

Have questions or need help?
If you are using the free version of CF7 Skins, you can get help via the CF7 Skins community and also the Contact Form 7 Support forum.
If you are using any of our Add-ons, we provide Premium Email Support to help with your questions and problems.